

So, you’ve always been intrigued by the art of origami, but never quite had the patience or skill to create anything beyond a simple paper crane. Well, get ready to unleash your inner paper-folding wizard, because “Cool Origami Animals” is here to take your origami game to a whole new level. With its sleek design and user-friendly instructions, this innovative product will guide you step-by-step in creating intricate and awe-inspiring origami animals. From adorable pandas to majestic eagles, “Cool Origami Animals” is the ultimate companion for both beginners and experienced origami enthusiasts alike. Get ready to amaze your friends and family with your newfound origami prowess – it’s time to fold and create like never before!

Understanding Origami and Its Basics
Origami is the ancient art of paper folding that originated in Japan. It is not only a creative and fun activity but also a way to relax and find inner peace. The word “origami” is derived from the Japanese words “oru” meaning “to fold” and “kami” meaning “paper.” In origami, a single sheet of paper is transformed into a beautiful work of art through precise folds and creases.
The History of Origami
Origami has a fascinating history that dates back more than a thousand years. It is believed that origami first emerged during the 6th century in Japan, but its exact origins are still a subject of debate among historians. Initially, origami was exclusively practiced by the nobility and religious practitioners. It was considered a form of entertainment and a way to show wealth and status.
The Basics of Origami Paper Folding
Origami is all about folding paper in specific patterns and sequences to create various shapes and figures. The most basic fold in origami is the valley fold, where you fold the paper towards you along a line, creating a “V” shape. Another common fold is the mountain fold, where you fold the paper away from you along a line, creating an inverted “V” shape. These simple folds form the foundation of more complex origami designs.
Different Types of Origami Papers
One of the key aspects of origami is choosing the right paper for your project. There are a variety of origami papers available, each with its own unique characteristics. Traditional origami paper, also known as kami, is usually square in shape and has a solid color on one side and a white color on the other. Washi paper is another popular choice, known for its strength and durability. Other options include foil paper, patterned paper, and even recycled paper.
Rules and Techniques of Origami
To achieve the desired result in origami, there are a few rules and techniques to keep in mind. The first and most important rule is to always start with a square sheet of paper. It is also crucial to have clean and crisp folds, as precision is key in origami. The use of tools such as a bone folder or a scoring tool can help achieve sharp creases. Additionally, understanding and following the instructions for each specific model or design is essential for successful origami folding.
Origami Fox
Materials Needed for Origami Fox
To create an origami fox, you will need a square sheet of origami paper. The standard size for origami paper is 6×6 inches, but you can also experiment with different sizes and colors to add your own unique touch to the fox.
Step by Step Guide to Create Origami Fox
- Start with the colored side of the paper facing up.
- Fold the paper in half diagonally to form a triangle and unfold.
- Fold the left and right corners of the triangle towards the center, creating a diamond shape.
- Fold the bottom corner of the diamond upwards, leaving a small gap at the top.
- Fold the bottom edge of the triangle upwards, aligning it with the top edge.
- Flip the paper over.
- Fold the left and right corners towards the center, creating small triangular flaps.
- Fold the top corners of the diamond towards the center, forming the ears of the fox.
- Tuck the triangular flaps into the pocket created in step 7 to secure the ears.
- The origami fox is now complete!
Tips and Tricks for Crafting Origami Fox
When folding the corners towards the center to create the triangular flaps, make sure to fold them slightly inward to give the fox a more three-dimensional look. Additionally, take your time with each fold and ensure that the creases are sharp and precise. Practice makes perfect, so don’t be discouraged if your first attempts are not perfect.
Meaning behind the Origami Fox
In Japanese folklore, the fox is believed to be a mischievous and cunning creature. However, it is also associated with intelligence, wisdom, and transformation. Folding an origami fox can represent the idea of adaptability and the ability to navigate through challenges and change with grace and cunning.

This image is property of i.ytimg.com.

Origami Swan
Tools Required for Origami Swan
To create an origami swan, you will need a square sheet of origami paper. The standard size for origami paper is 6×6 inches, but larger or smaller sizes can be used depending on your preference. Additionally, a flat surface to work on and a bone folder or scoring tool can be helpful for achieving clean and crisp folds.
Detailed Instructions for Making Origami Swan
- Start with the colored side of the paper facing up.
- Fold the paper in half diagonally to form a triangle and unfold.
- Fold the left and right corners of the triangle towards the center, creating a smaller triangle.
- Fold the bottom edge of the smaller triangle upwards, leaving a small gap at the top.
- Unfold the previous step and bring the top corner of the triangle down to meet the bottom edge, creating a diamond shape.
- Fold the left and right corners of the diamond towards the center, allowing them to meet in the middle.
- Fold the top portion of the diamond downwards, aligning it with the bottom edge.
- Flip the paper over.
- Fold the left and right corners of the diamond towards the center, creating small triangular flaps.
- Fold the top corner of the diamond downwards, creating the head of the swan.
- Fold the bottom corners of the diamond upwards, forming the wings of the swan.
- Gently pull the bottom portion of the swan upward to create the body shape.
- Adjust and shape the wings and neck of the swan as desired.
- The origami swan is now complete!
Expert Advice for Making Perfect Origami Swan
To achieve an elegant and graceful swan, take your time with each fold and make sure the creases are precise. It can be helpful to use a bone folder or scoring tool to create sharp and clean creases. As you shape the wings and neck of the swan, pay attention to the proportions and adjust them to create a more lifelike appearance. Don’t be afraid to experiment with different sizes and colors of paper to add your own personal touch to your origami swan.
Symbolism of Swan in Origami Art
In many cultures, swans are symbols of beauty, grace, and purity. In the art of origami, folding a swan often represents elegance and tranquility. The graceful curves and folds of the swan’s body mirror the delicate beauty of the real-life bird. Creating an origami swan can be a meditative process, allowing you to channel these qualities and bring a sense of calm and serenity to your space.
Origami Panda
Panda Origami – Required Materials
To create an origami panda, you will need a square sheet of origami paper. The standard size for origami paper is 6×6 inches, but larger or smaller sizes can be used depending on your preference. Traditional black and white origami paper is commonly used for pandas to capture their iconic color scheme.
Techniques to Make Origami Panda
Creating an origami panda requires a combination of folds and mountain and valley creases. Follow these steps to make an origami panda:
- Start with the colored side of the paper facing up.
- Fold the paper in half diagonally to form a triangle and unfold.
- Fold the left and right corners of the triangle towards the center, creating a smaller triangle.
- Fold the bottom edge of the smaller triangle upwards, leaving a small gap at the top.
- Unfold the previous step and bring the top corner of the triangle down to meet the bottom edge, creating a diamond shape.
- Fold the left and right corners of the diamond towards the center, allowing them to meet in the middle.
- Fold the top portion of the diamond downwards, aligning it with the bottom edge.
- Flip the paper over.
- Fold the left and right corners of the diamond towards the center, creating small triangular flaps.
- Fold the top corner of the diamond downwards, creating the head of the panda.
- Fold the bottom corners of the diamond upwards, forming the legs of the panda.
- Adjust and shape the head and legs of the panda to give it a more three-dimensional look.
- The origami panda is now complete!
Best Practices for Origami Panda
When folding the head and legs of the panda, pay attention to the proportions and adjust them to create a more realistic appearance. Take your time with each fold and ensure that the creases are sharp and precise. Experiment with different sizes and colors of paper to add variety to your collection of origami pandas. Remember, practice makes perfect, so don’t be discouraged if your first attempts are not flawless.
Origami Panda Symbolism
The panda is a beloved and iconic animal, often symbolizing peace, harmony, and protection in various cultures. In the art of origami, folding a panda can represent the conservation efforts and the importance of preserving nature and wildlife. Pandas are also associated with gentleness and inner strength, making them a favorite subject for origami enthusiasts. Folding an origami panda can be a reminder of the beauty and fragility of nature and a tribute to these endearing creatures.

This image is property of i.ytimg.com.
Origami Butterfly
Needed Accessories for Origami Butterfly
To create an origami butterfly, you will need a square sheet of origami paper. The standard size for origami paper is 6×6 inches, but feel free to experiment with different sizes and colors to add your own unique touch to the butterfly. No additional tools or accessories are required for this particular origami project.
Procedure for Crafting Origami Butterfly
- Start with the colored side of the paper facing up.
- Fold the paper in half diagonally to form a triangle and unfold.
- Fold the left and right corners of the triangle towards the center, creating a smaller triangle.
- Fold the bottom edge of the smaller triangle upwards, leaving a small gap at the top.
- Unfold the previous step and bring the top corner of the triangle down to meet the bottom edge, creating a diamond shape.
- Rotate the diamond so that the longer side is horizontal.
- Fold the left and right corners of the diamond towards the center, creating small triangular flaps.
- Fold the top corner of the diamond downwards, creating the top wings of the butterfly.
- Repeat step 8 with the bottom corner of the diamond to create the bottom wings of the butterfly.
- Unfold the wings slightly to give them a more three-dimensional look.
- Gently curve the wings upwards to give the butterfly its characteristic shape.
- The origami butterfly is now complete!
Tips to Enhance Your Origami Butterfly
To add a personal touch to your origami butterfly, experiment with different colors and patterns of origami paper. You can also customize the size of the butterfly by using larger or smaller sheets of paper. Take your time with each fold and ensure that the creases are sharp and precise. As you fold the wings, try different angles and shapes to create a unique and dynamic butterfly. With practice and experimentation, you can create a beautiful collection of origami butterflies.
Cultural Significance of Butterfly in Origami
In many cultures, the butterfly is seen as a symbol of transformation, freedom, and beauty. Folding an origami butterfly can represent personal growth, letting go of the past, and embracing change. The delicate and intricate folds of the butterfly’s wings mirror the complexity and beauty of life’s transformations. By creating an origami butterfly, you can capture the essence of these symbolic meanings and bring a sense of wonder and inspiration to your origami practice.
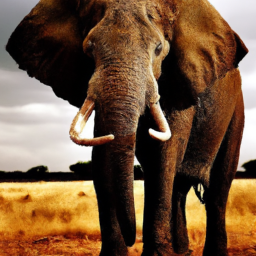
Origami Elephant
Elephant Origami – Needed Materials
To create an origami elephant, you will need a square sheet of origami paper. The standard size for origami paper is 6×6 inches, but larger or smaller sizes can be used depending on your preference. Choosing a gray or silver origami paper can add to the realistic appearance of the elephant.
Method of Crafting Origami Elephant
Creating an origami elephant involves a series of folds and creases. Follow these steps to make an origami elephant:
- Start with the colored side of the paper facing up.
- Fold the paper in half diagonally to form a triangle and unfold.
- Fold the left and right corners of the triangle towards the center, creating a smaller triangle.
- Fold the bottom edge of the smaller triangle upwards, leaving a small gap at the top.
- Unfold the previous step and bring the top corner of the triangle down to meet the bottom edge, creating a diamond shape.
- Fold the left and right corners of the diamond towards the center, allowing them to meet in the middle.
- Fold the top portion of the diamond downwards, aligning it with the bottom edge.
- Flip the paper over.
- Fold the left and right corners of the diamond towards the center, creating small triangular flaps.
- Fold the top corner of the diamond downwards, creating the head of the elephant.
- Fold the bottom corners of the diamond upwards, forming the legs of the elephant.
- Fold the top portion of the diamond upwards, creating the body of the elephant.
- Adjust and shape the head, legs, and body of the elephant to give it a more three-dimensional and realistic look.
- The origami elephant is now complete!
Mastering the Art of Making Origami Elephant
Creating a lifelike origami elephant requires precision and attention to detail. Take your time with each fold and make sure that the creases are sharp and precise. As you fold the head, legs, and body of the elephant, experiment with shaping and adjusting them to create a more realistic appearance. Using a larger sheet of origami paper can allow for more intricate details and a greater level of realism. With practice and patience, you can perfect the art of making origami elephants that truly capture their majestic presence.
The Symbol and Meaning of Elephant in Origami
The elephant holds great symbolism in many cultures, representing strength, wisdom, and good luck. In the art of origami, folding an elephant can be seen as a way to honor and pay tribute to these magnificent creatures. Elephants are known for their intelligence and their close-knit social communities, making them a favorite subject for origami enthusiasts. By creating an origami elephant, you can tap into these symbolic qualities and bring a sense of power and grace to your origami collection.

This image is property of origami.me.
Origami Dragon
Tools for Making Origami Dragon
To create an origami dragon, you will need a square sheet of origami paper. The standard size for origami paper is 6×6 inches, but larger sizes can be used for a more intricate dragon design. Additionally, a flat surface to work on and a bone folder or scoring tool can be helpful for achieving clean and crisp folds.
Steps Involved in Crafting Origami Dragon
Creating an origami dragon requires a series of folds and creases. Follow these steps to make an origami dragon:
- Start with the colored side of the paper facing up.
- Fold the paper in half diagonally to form a triangle and unfold.
- Fold the left and right corners of the triangle towards the center, creating a smaller triangle.
- Fold the bottom edge of the smaller triangle upwards, leaving a small gap at the top.
- Unfold the previous step and bring the top corner of the triangle down to meet the bottom edge, creating a diamond shape.
- Fold the left and right corners of the diamond towards the center, allowing them to meet in the middle.
- Fold the top portion of the diamond downwards, aligning it with the bottom edge.
- Flip the paper over.
- Fold the left and right corners of the diamond towards the center, creating small triangular flaps.
- Fold the top corner of the diamond downwards, creating the head of the dragon.
- Fold the bottom corners of the diamond upwards, forming the legs of the dragon.
- Fold the top portion of the diamond upwards, creating the body of the dragon.
- Gently pull the bottom portion of the dragon upward to create a more three-dimensional and dynamic shape.
- Adjust and shape the head, legs, and body of the dragon to give it a distinct and fierce appearance.
- The origami dragon is now complete!
Advice for Perfect Origami Dragon
Crafting a perfect origami dragon requires practice and patience. Take your time with each fold and ensure that the creases are sharp and precise. As you shape the head, legs, and body of the dragon, experiment with different angles and proportions to give it a unique and dynamic look. Use a larger sheet of origami paper to allow for more intricate details and a more impressive finished dragon. With dedication and perseverance, you can master the art of making origami dragons that capture their mythical and awe-inspiring qualities.
Symbolism of Dragon in Origami Culture
In many Asian cultures, the dragon is a revered creature symbolizing power, strength, and good fortune. Folding an origami dragon can be seen as a way to tap into these symbolic qualities and harness their positive energies. Dragons are often associated with wisdom and protection, making them popular subjects for origami enthusiasts. By creating an origami dragon, you can infuse your space with an aura of mystique and legend, and honor the rich cultural heritage surrounding these fascinating creatures.
Origami Lion
Materials Required for Lion Origami
To create an origami lion, you will need a square sheet of origami paper. The standard size for origami paper is 6×6 inches, but larger sizes can be used to allow for more intricate details. Choose a color and pattern that represents the vibrant and majestic nature of lions.
Instructions for Making Lion Origami
Creating an origami lion involves a combination of folds and creases. Follow these steps to make an origami lion:
- Start with the colored side of the paper facing up.
- Fold the paper in half diagonally to form a triangle and unfold.
- Fold the left and right corners of the triangle towards the center, creating a smaller triangle.
- Fold the bottom edge of the smaller triangle upwards, leaving a small gap at the top.
- Unfold the previous step and bring the top corner of the triangle down to meet the bottom edge, creating a diamond shape.
- Fold the bottom corners of the diamond upwards, forming the front legs of the lion.
- Fold the top portion of the diamond downwards, aligning it with the bottom edge.
- Flip the paper over.
- Fold the left and right corners of the diamond towards the center, creating small triangular flaps.
- Fold the top portion of the diamond upwards, creating the head of the lion.
- Bring the bottom portion of the diamond upward to create the body of the lion.
- Adjust and shape the legs, head, and body of the lion to give it a more three-dimensional and realistic appearance.
- The origami lion is now complete!
Tips and Suggestions for Creating Origami Lions
Creating a lifelike origami lion requires attention to detail and precision. Take your time with each fold and ensure that the creases are sharp and crisp. As you shape the legs, head, and body of the lion, experiment with the angles and proportions to capture the distinctive features of a lion. Use a larger sheet of origami paper to allow for more intricate details and a more impressive finished lion. Practice makes perfect, so keep folding and exploring different techniques to enhance your origami lion creations.
Interpreting the Symbolism of Origami Lion
In many cultures, the lion is a symbol of strength, courage, and leadership. Folding an origami lion can be seen as a way to embody these qualities and channel their power and energy. Lions are often associated with royalty and majesty, making them a popular and commanding figure in the world of origami. By creating an origami lion, you can tap into the symbolic meanings of strength and leadership, and bring a sense of empowerment to your space. Let the lion inspire you to embrace your own inner strength and lead with confidence and courage.

This image is property of origami.me.
Origami Bunny
Resource Material for Bunny Origami
To create an origami bunny, you will need a square sheet of origami paper. The standard size for origami paper is 6×6 inches, but larger or smaller sizes can be used depending on your preference. Choosing a color and pattern that represents the playful and charming nature of bunnies can enhance your origami bunny creation.
Procedure to Fold a Bunny Origami
Creating an origami bunny involves a series of folds and creases. Follow these steps to make an origami bunny:
- Start with the colored side of the paper facing up.
- Fold the paper in half diagonally to form a triangle and unfold.
- Fold the left and right corners of the triangle towards the center, creating a smaller triangle.
- Fold the bottom edge of the smaller triangle upwards, leaving a small gap at the top.
- Unfold the previous step and bring the top corner of the triangle down to meet the bottom edge, creating a diamond shape.
- Fold the top corner of the diamond downwards, creating the head of the bunny.
- Fold the bottom corners of the diamond upwards, forming the legs of the bunny.
- Adjust and shape the head and legs of the bunny to give it a more three-dimensional and adorable appearance.
- The origami bunny is now complete!
Expert Tips for Crafting Origami Bunny
Creating a charming origami bunny requires attention to detail and precision. Take your time with each fold and ensure that the creases are sharp and crisp. As you shape the head and legs of the bunny, experiment with different angles and proportions to capture the playful and endearing nature of bunnies. Use a larger sheet of origami paper to allow for more intricate details and a more striking bunny. Be patient with yourself, as origami takes practice, and each bunny you fold will bring you closer to mastering the art of origami.
Decoding the Meaning of Origami Bunny
Bunnies are often associated with fertility, new beginnings, and joy. In many cultures, they are symbols of abundance and prosperity. Folding an origami bunny can represent the celebration of life, growth, and positive energy. Bunnies are adored for their cute and cuddly nature, making them a popular subject for origami enthusiasts. By creating an origami bunny, you can infuse your space with a sense of playfulness and happiness, and welcome the joy and abundance associated with these delightful creatures.
Preserving and Showcasing Your Origami Work
How to Preserve Your Origami Work
After investing time and effort into creating origami animals, it is important to preserve them properly to ensure their longevity. Here are a few tips on how to preserve your origami work:
- Keep your origami animals away from direct sunlight, as it can fade and weaken the paper over time.
- Store your origami pieces in a clean and dry environment to prevent moisture and mold from damaging them.
- Avoid touching your origami with dirty or oily hands, as it can leave stains and deteriorate the paper.
- If you want to display your origami animals, consider placing them in a protective display case to shield them from dust and potential damage.
Creative Ways to Display Origami Animals
Displaying your origami animals can add a touch of beauty and artistry to any space. Here are a few creative ways to showcase your origami creations:
- Create a mobile or hanging display by attaching your origami animals to a fishing wire or thread and suspending them from a ceiling or a wall.
- Place your origami animals on a shadow box or a floating frame to create a three-dimensional effect.
- Arrange your origami animals on a decorative tray or plate and use it as a centerpiece or a decorative accent.
- Attach your origami animals to a string or ribbon and create a garland or a banner to hang across a room or a doorway.
Presenting Origami Animals as Gifts
Origami animals make unique and thoughtful gifts for friends and loved ones. Here are a few suggestions on how to present your origami animals as gifts:
- Package your origami animals in a decorative box or a gift bag. Include a handwritten note explaining the symbolism or significance of the animal you have created.
- Attach your origami animal to a card or a bookmark to create a personalized and meaningful gift.
- Create a set of origami animals representing the Chinese zodiac signs and give them as a complete set or individually based on the recipient’s zodiac sign.
- Place your origami animals in a glass jar with a ribbon tied around the lid. This will create a beautiful and decorative display that the recipient can cherish.
By presenting your origami animals as gifts, you can share the joy of origami with others and create lasting memories.
